


Is a microwave kiln right for you?
The microwave kiln is great for people who are dipping their toes into fused glass art. They are affordable, fire projects quickly, and require no special tools outside of a glass separator and safety gear. On the other hand, they degrade over time, have almost no temperature control, are limited in size, and have a higher chance of ruining your piece than a traditional kiln.
⁂
New! Looking for the perfect starter kit for your microwave kiln glass journey? Glacial Art Glass now offers microwave kiln glass packs containing a little bit of every type of glass we offer, so you can explore the world of art glass on a budget! Available in six different color themes, in both COE 90 and COE 96!

⁂
Pros of using a microwave kiln:
- Speed: The microwave kiln is perfect for tiny projects and rapid prototyping. If you’re firing something small (2 ¾” across at maximum), like jewelry, or need to test colors for a larger project, it's very convenient to pop it into the microwave kiln and get it back in half an hour instead of having to wait hours for a traditional kiln to heat and cool.
- Accessibility: A microwave kiln can be bought online for around $30 – compare this with the next cheapest kiln at nearly $300, and then compare that with the traditional kilns that start at around $1,000, and you can see why someone would put up with the microwave kiln!
- Size: A traditional kiln is large and radiates heat, but a microwave kiln can be used anywhere you can put a microwave, making it perfect for apartment and studio dwellers who wouldn’t have space to use a kiln otherwise.

A traditional kiln must be kept on a tall heatproof stand, but the microwave kiln is much more compact.
Cons of using a microwave kiln:
- No temperature control: The temperature your project reaches is very important for achieving specific results. (For more on this, with pictures of our glass from 1375°F to 1500°F, please read our Tack Fuse Tip Sheet.) An electronically controlled kiln has fine-tuned temperature, ramp, and time settings, meaning that it can control how hot the interior gets, how quickly it gets to that temperature, and how long it holds there. A microwave kiln has none of those things; the only way to tell what temperature your glass has reached is to pick up the lid of the microwave kiln and look at the hot glass yourself! With some practice, you can learn how to roughly achieve a higher or lower working temperature in a microwave kiln, but never to the precision of an electronically controlled kiln.
- Lack of consistency: As mentioned in the first point, the microwave kiln is impossible to control fully. A schedule that worked for your project one time may need a couple minutes more or less the next time, and it’s easy to fire up the kiln, peek at your still-unfused glass, pop it in for another minute, and realize you’ve completely overcooked it. This can ruin a project, with a tack fuse melting into a full fuse, or a full fuse getting blown out and distorted like the murrine below! Additionally, as the heating material inside the lid of the microwave kiln degrades over time, it will take longer and longer to get the same results, with the full lifetime of a microwave kiln being 200-300 firings. A traditional kiln will have a much greater consistency between firings and much longer lifetime.

Overcooked vs. well-fired murrine - quite the difference!
- Size: A pro and a con! With the small microwave kiln, your working platform is limited to a 2 ¾” circle, which gets used up quickly, given that you need to leave space between pieces of glass that you don’t want to get fused together. The large microwave kiln gives you a working platform of almost 5”, but due to the uneven/inconsistent heating of the microwave kiln, I would advise against trying to fire a single piece of glass that used the full platform. I'll be writing a blog post soon all about trying to fire a single 3" square tile in the big kiln! Also, while there are vermiculite molds available in the UK and Europe that are designed to be used with a large microwave kiln, overall you’ll be limited to small flat pieces with no draping or slumping.
- Poor construction: One of the most frustrating aspects of using a microwave kiln is when you open the kiln only to find a few ugly black specks on your perfectly fired glass! From the moment you open your microwave kiln for the first time, you may notice small chunks of the black heating material falling off the interior of the lid, and every few firings some of it ends up falling on the kiln bottom and glass below. In the long run, this unpredictability, frustration, and loss of time and materials can really add up.

I was testing these red Cape Jasmine murrine on a piece of white scrap, the grey specks are dust from the kiln.
Must haves for using a microwave kiln:
- Heatproof safety gloves: You have to take the hot kiln out of the microwave to cool – if left inside, the heat radiating out of the top of the kiln has a chance to ruin the ceiling of your microwave. This makes a thick pair of oven-safe gloves a necessity before you fire up your kiln for the first time! In the studio, I use a pair of leather welding gloves, but a solid pair of oven gloves will also do the trick. You’ll want a pair that lets you hold the top and bottom of the kiln steady as you take it out of the microwave, to avoid bumping your still-molten glass inside.

The lid of the microwave kiln gets glowing hot!
- Brick, tile, or other heatproof surface: Once you’ve taken the hot kiln out of the microwave, you need to (quickly) put it down somewhere that won’t be damaged by the heat. This could be a brick or cinderblock, or something like a raised metal trivet – don’t try to use a pot holder or folded towel, it needs to be something that won’t catch on fire if accidentally exposed to the extremely high temperatures the microwave kiln can reach inside.
- Glass separator: Fiber paper or kiln wash, something to keep the glass from sticking to the bottom of your kiln. I recommend Bullseye Shelf Primer, read more on this below.
- Kiln bricks (technically optional): These can be any small, flat heatproof tiles or bricks that go under the bottom of your microwave kiln to keep it elevated from the glass turntable of the microwave. The turntable is not designed for the temperatures the microwave kiln reaches, and neither is the floor of the microwave underneath it, so you want to keep the kiln raised off the bottom. If you don’t have anything like this, you can flip your microwave’s turntable upside-down, so it rests above the microwave floor and not directly on it. However, this means the kiln will not rotate, which can lead to less consistent heating. Make sure you check the lid of the kiln for any hot spots forming, and rotate the lid around the kiln base to move the heat around if there are.

Microwave kiln on large kiln bricks - I normally use smaller ones, so these big ones aren't absorbing all the heat.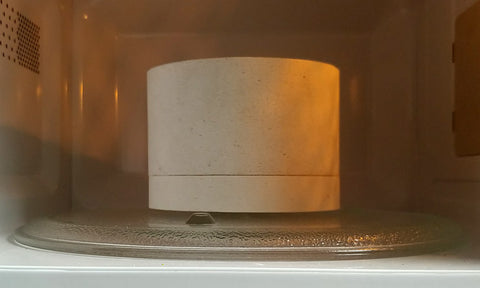
Microwave kiln on the upturned turntable. Note the plastic rotating piece is removed!
- A dedicated microwave : It is recommended to use a separate microwave for your fusing projects to avoid contaminating food with any possible off-gassing or other contaminants. There is also a chance that your kiln projects might damage the microwave. Give yourself some peace of mind and pick up a cheap used microwave from Craigslist or your local thrift store.
⁂
Safety tip #0: The kiln gets HOT!
A microwave kiln is heated by the metallic coating in the kiln lid. Glass fully fuses at around 1500°F (815°C), which means when the lid of the kiln is glowing hot, it is HOT! If the lid isn’t face down on the base of the kiln, it needs to be placed face up on your heatproof tile or brick outside the microwave, so the heating material is facing out and radiating heat into the air instead of trapping it underneath the lid or in the microwave. Never touch any part of the microwave kiln with your bare hands unless you know it’s cool – the lid is the worst offender but even the base stays hot for a while after it’s been fired.

When you see the hole of the lid glowing, you know the glass inside has reached fusing temperatures.

Glowing hot glass - you'll need to peek inside the microwave kiln like this to see what your glass is doing!
⁂
Glass separators and microwave kilns: Fiber paper vs. Kiln wash
Any time you’re firing glass, you need some kind of glass separator on the kiln shelf or the glass will stick to the hot surface. Many microwave kilns you’ll find online come with a few pieces of fiber paper, but in my experience, a traditional kiln wash is superior. Fiber paper is made with ceramic fibers and starts to disintegrate after one firing. It’s unpleasant to the touch, can leave residue and a rough finish on the back of your glass, and is carcinogenic if you breathe in any of the fibers. It also gives off a nasty smell while it's being fired, so you'll need to do it outside or in a well-ventilated area.
Kiln wash (we use Bullseye Shelf Primer in the studio) leaves a smooth back on your project, almost no residue if used right, and in bulk, is cheaper than buying fiber paper. Kiln wash comes as a powder, so you’ll need to wear a dust mask while mixing it together, but after it’s suspended in water, it’s completely safe to use. Mix your kiln wash according to the manufacturer’s instructions, then use a small brush to apply a single coat to the microwave kiln platform. Pop the kiln bottom into the microwave with the lid off for one minute to dry it before use to make sure the kiln wash is fully fused. You’ll need to apply a fresh coat of kiln wash between firings (it will start a pinkish color and fire to white so you can tell when it needs to be recoated), and you should gently sand off built-up dried kiln wash every 3-5 firings to keep your glass as free from residue as possible.

These stringer strips (fired on kiln wash and fiber paper respectively, viewed from the back) are fresh out of the kiln and haven't been cleaned at all. Most of the fiber will wash off, but the glass on the right will never be as smooth as the one on the left.
The basic steps of fusing glass in a microwave kiln
- 1. Prepare your glass separator: Put a fresh coat of kiln wash on the working platform and let it dry (or put it in the microwave for 1 minute uncovered for a quicker dry), or put a piece of fiber paper down.
- 2. Prepare your turntable: Put three kiln bricks down in a tripod arrangement in the center of your microwave’s turntable. If you don’t have kiln bricks, flip the turntable over to elevate it and the kiln off the floor of the microwave, remembering to remove the plastic rotating piece from underneath.
- 3. Put your glass on the microwave kiln platform: Outside the microwave, put your glass on the working platform of the kiln bottom, making sure all of it is touching kiln wash or fiber paper or the glass will stick permanently to the microwave kiln. Leave about a quarter of an inch around the perimeter of the platform and between pieces you don’t want fused – when glass hits temperature, it melts and spreads, which can glue your kiln shut or leave pieces stuck together if you’re not careful.
- 4. Put the bottom of the kiln in the microwave: Carefully put the bottom of the kiln on top of your kiln bricks or raised turntable, making sure not to bump and disturb your glass. If something gets knocked out of place, now is the time to fix it!
- 5. Put the lid of the microwave kiln on the base: Lower the lid straight down onto the base of the kiln, where it should rest around the working platform without touching any of your glass.
- 6. First fire: Start the microwave at 2-3 minutes. This will serve as a sort of pre-fire, warming up the microwave kiln and the glass together without getting hot enough to fuse. If you’re firing a delicate project, such as something held together with glass adhesive, or just want to be extra careful, you can do this dry (without any glass inside), so the heating material in the lid has a chance to get up to temperature without effecting the glass at all. If you do this, be very, very careful when putting your glass on the platform – it will be hot!
- 7. Stop and check: With your heatproof gloves, carefully lift the lid to look at your glass. Look for any sign of uneven heating, such as hot spots on the lid, or glass that’s melting faster than the rest. If the microwave kiln is heating unevenly, you can rotate the lid around the base to move the heat around. Try to do this as quick as you can, since you’re letting out heat and cooling down everything as soon as you remove the lid. If something has fallen out of place, this is the time to take the whole kiln out of the microwave, put it on your heatproof surface, and let the glass cool before safely adjusting. Always remember to put the hot lid of the microwave kiln face up (heating material facing out) on your heatproof surface any time it’s not on the kiln base.
- 8. Second and further fires: After your kiln has started to heat up, it’s time to get it up to working temperature. This is the part that varies the most with your microwave, your kiln, and the project being fired. It’s always safer to heat it up slowly so you don’t end up overcooking your glass. With our 900W microwave, I found that letting it run for a minute at a time and peeking at the glass each time was the best way to control the temperature inside the kiln. If you have a more powerful microwave, you may want to start with 30 seconds at a time, and if you have a less powerful microwave, it might be easier to go with 1:30 minute increments.
- 9. Let it rest closed: Once your project has fused to your liking, keep the lid on the base and take the whole kiln out of the microwave, being careful to keep it level as you pull it out to make sure the glass doesn’t slide and touch the walls. Put it on your heatproof surface and let it sit, covered, for 10 to 20 minutes. This will let the kiln and glass cool down slower and will help prevent cracks in your project from thermal stress.
- 10. Open it up: After the kiln has rested, take the lid off and place it face up on your heatproof surface. The glass inside will still be hot, even if it doesn’t look like it is, so don’t touch! Hot glass looks exactly the same as cool glass (aside from some color changes), so let it rest with the lid off for at least another 5-10 minutes depending on the size of the project.
- 11. Soak the pieces: Once your glass pieces are cool enough to handle, take them off the platform and put them into a small bowl of vinegar to soak. This will remove any residue from the kiln wash or fiber paper that may have stuck to the bottom of your project. You may need to scrub lightly to get it all off.
⁂
Thank you for reading my tips for the basics of microwave kiln use! This is the compilation of a few weeks of microwaving glass pretty much all day, and I hope you find it useful. If you have any questions about fusing glass in microwave kilns, feel free to ask down below and I'll give it my best shot!
If you want more detailed information about fusing glass in a microwave kiln, including how to tack/contour fuse and notes about annealing in the microwave kiln, please check out my post on Advanced Tips and Tricks for Microwave Kiln Fusing! I'm also working on a post all about the large microwave kiln and firing large projects.
In the future, I'll have more fun posts showing you some of the cool things you can make in the microwave kiln with Glacial glass - make sure to sign up for our newsletter so you get notified when a new project inspiration post goes up!
Hi. Nice tutorial. Can a ceramic floor tile make a good base for the kiln?
Thanks much!
Is there any kind of discharge, such as gas or odor, when using a microwave kiln? I have birds that can become deathly ill from some gasses or odors.
Thank you for sharing this very valuable information. I wish I had read this before I purchased my kiln. I do have a large ceramic kiln and someday will try using it for my glass fusing. Thank you!
Evidently my glass became “unstacked” while rotating in my microwave and now there is fused glass on the bottom of my kiln. Can I repair it? Is there to get the glass off?
Thank you
Really glad I read your article about microwave kilns, I’m still trying to learn as much as I can before I order one
So I’ll be watching for more instructions
About it
Thanks
Isabel